用 ComfyUI + LoRA 打造 Galgame 美少女管線:從訓練到出圖到 Web GUI
將之前做的產圖寫一份報告
整個 pipeline 拆成三層:
- 訓練端(kohya_ss + 自製多姿勢 base img2img)
- 出圖端(ComfyUI A+B+F workflow:LoRA → Hi-Res Fix → FaceDetailer)
- 操作端(Streamlit 角色管線)。
資料源是單一 YAML,從外觀 prompt、表情、CG 階段、LoRA,檔名全部寫在一處,下游全靠 loader 拼裝。
下面是使用技術
層級: 基礎模型
  技術: Stable Diffusion 1.5 / SDXL
  角色: checkpoint:MeinaMix v12(主力)、AnythingV5、Counterfeit V3、AnimagineXL 3.1
  ────────────────────────────────────────
  層級: 角色綁定
  技術: LoRA(kohya_ss 訓練)
  角色: 每個角色 1 份 *.safetensors,觸發詞 = char_id
  ────────────────────────────────────────
  層級: 生成引擎
  技術: ComfyUI + REST API
  角色: 用 Python 透過 /prompt、/history 餵 workflow JSON
  ────────────────────────────────────────
  層級: 構圖修正
  技術: Hi-Res Fix(潛空間 1.5x 重採)
  角色: 512×768 → 768×1152
  ────────────────────────────────────────
  層級: 臉部修復
  技術: Impact Pack 的 FaceDetailer + CLIPSeg
  角色: 自動偵測臉 → 裁切 → 局部重繪 → 貼回
  ────────────────────────────────────────
  層級: 訓練素材
  技術: img2img + 5 種姿勢 base + variation pool
  角色: 用同一個白底底圖隨機抽 view/pose/expression/lighting/framing/background 拼 caption
  ────────────────────────────────────────
  層級: 後處理
  技術: rembg (u2net)
  角色: 立繪去背成透明 PNG
  ────────────────────────────────────────
  層級: Web GUI
  技術: Streamlit + YAML
  角色: 沒有自己寫 React/Vue,全靠 Streamlit + subprocess.run() 呼後端腳本
整個 GALS 專案需要兩類圖:
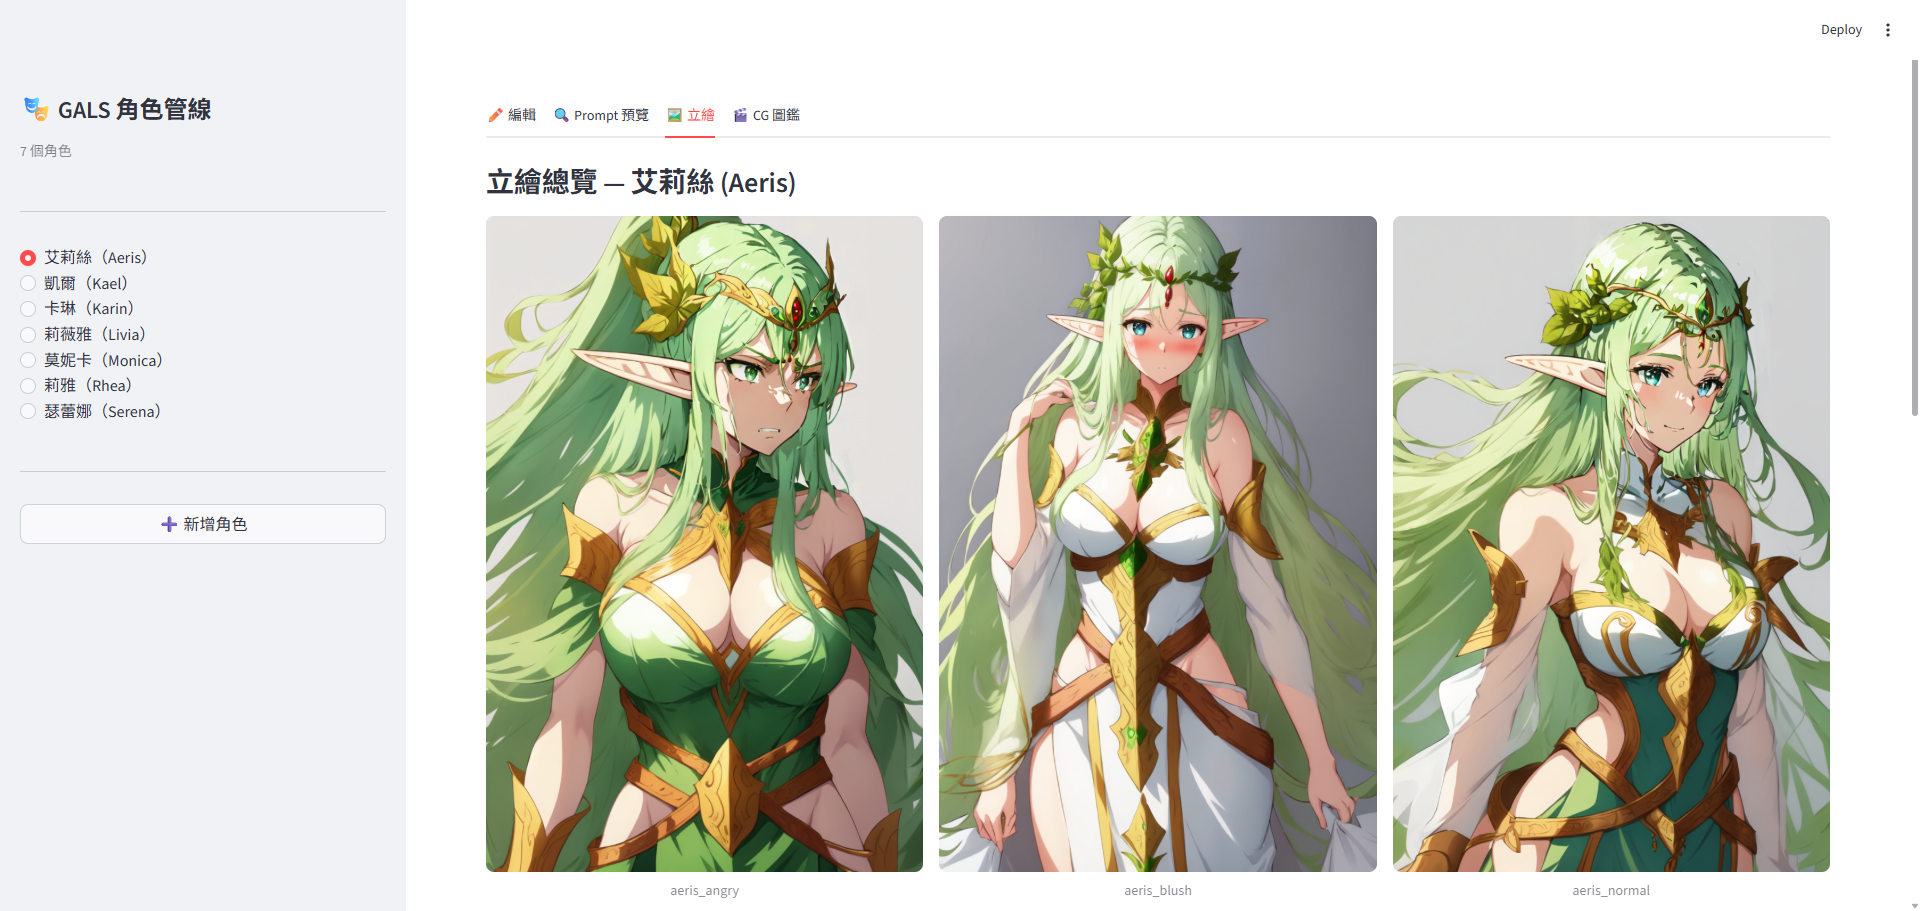
- 角色立繪(對話用)— 每角色 6 表情 × 6 角色 = 36 張透明 PNG。
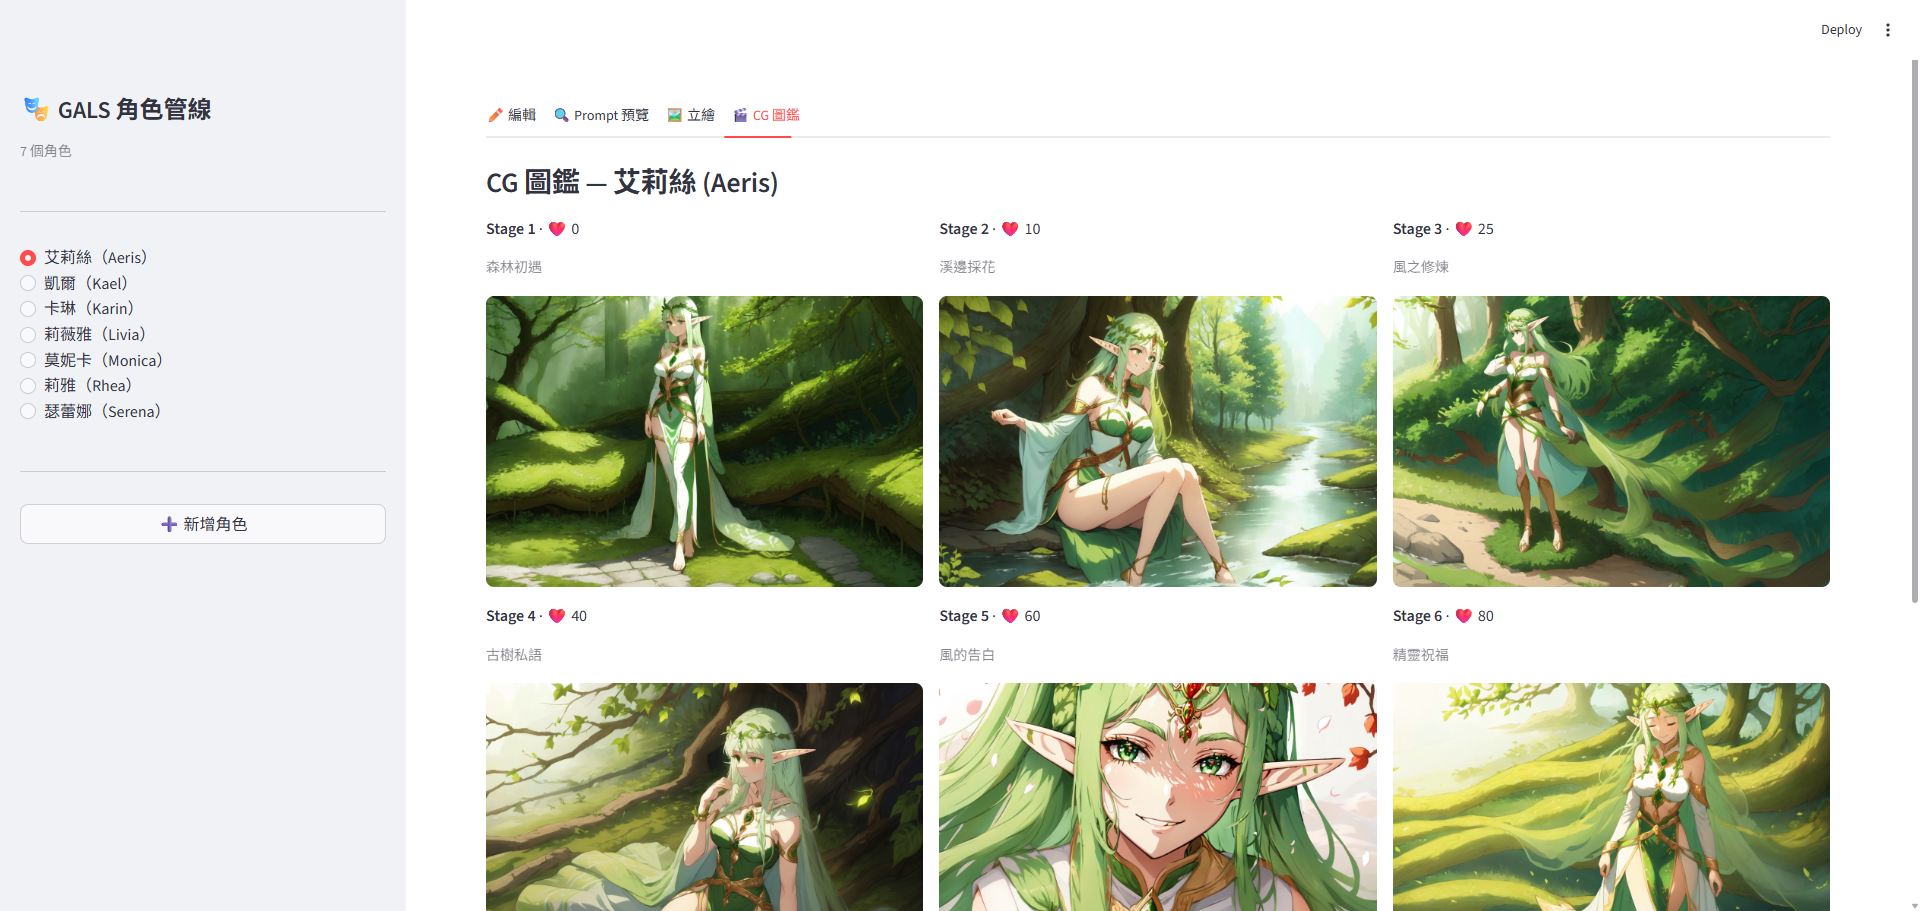
- 親密度 CG 圖鑑(戀愛系統)— 每角色 6 個親密度階段(affection 0→80),共 36 張橫版 CG。
兩條線都吃同一份 chars/
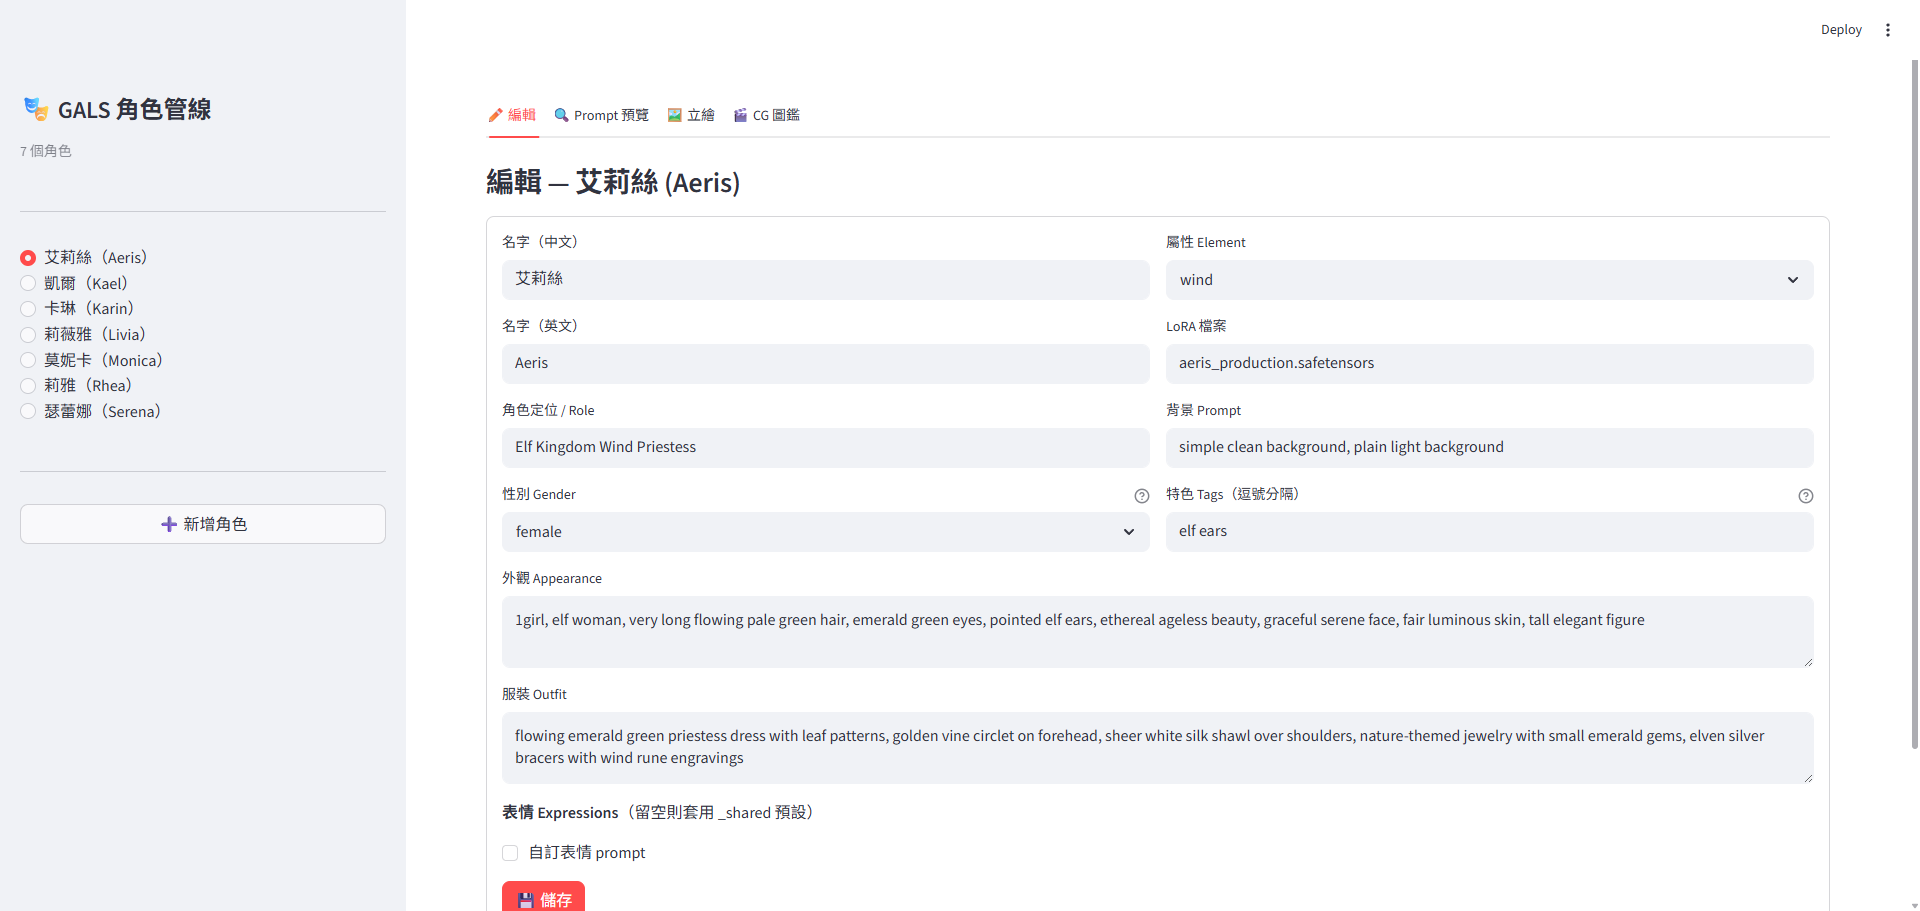
id: aeris
lora_file: aeris_production.safetensors
appearance: 1girl, elf woman, very long flowing pale green hair, emerald green eyes, ...
outfit: flowing emerald green priestess dress with leaf patterns, ...
tags: [elf ears]
cg_stages:
- stage: 1
affection: 0
desc: 森林初遇
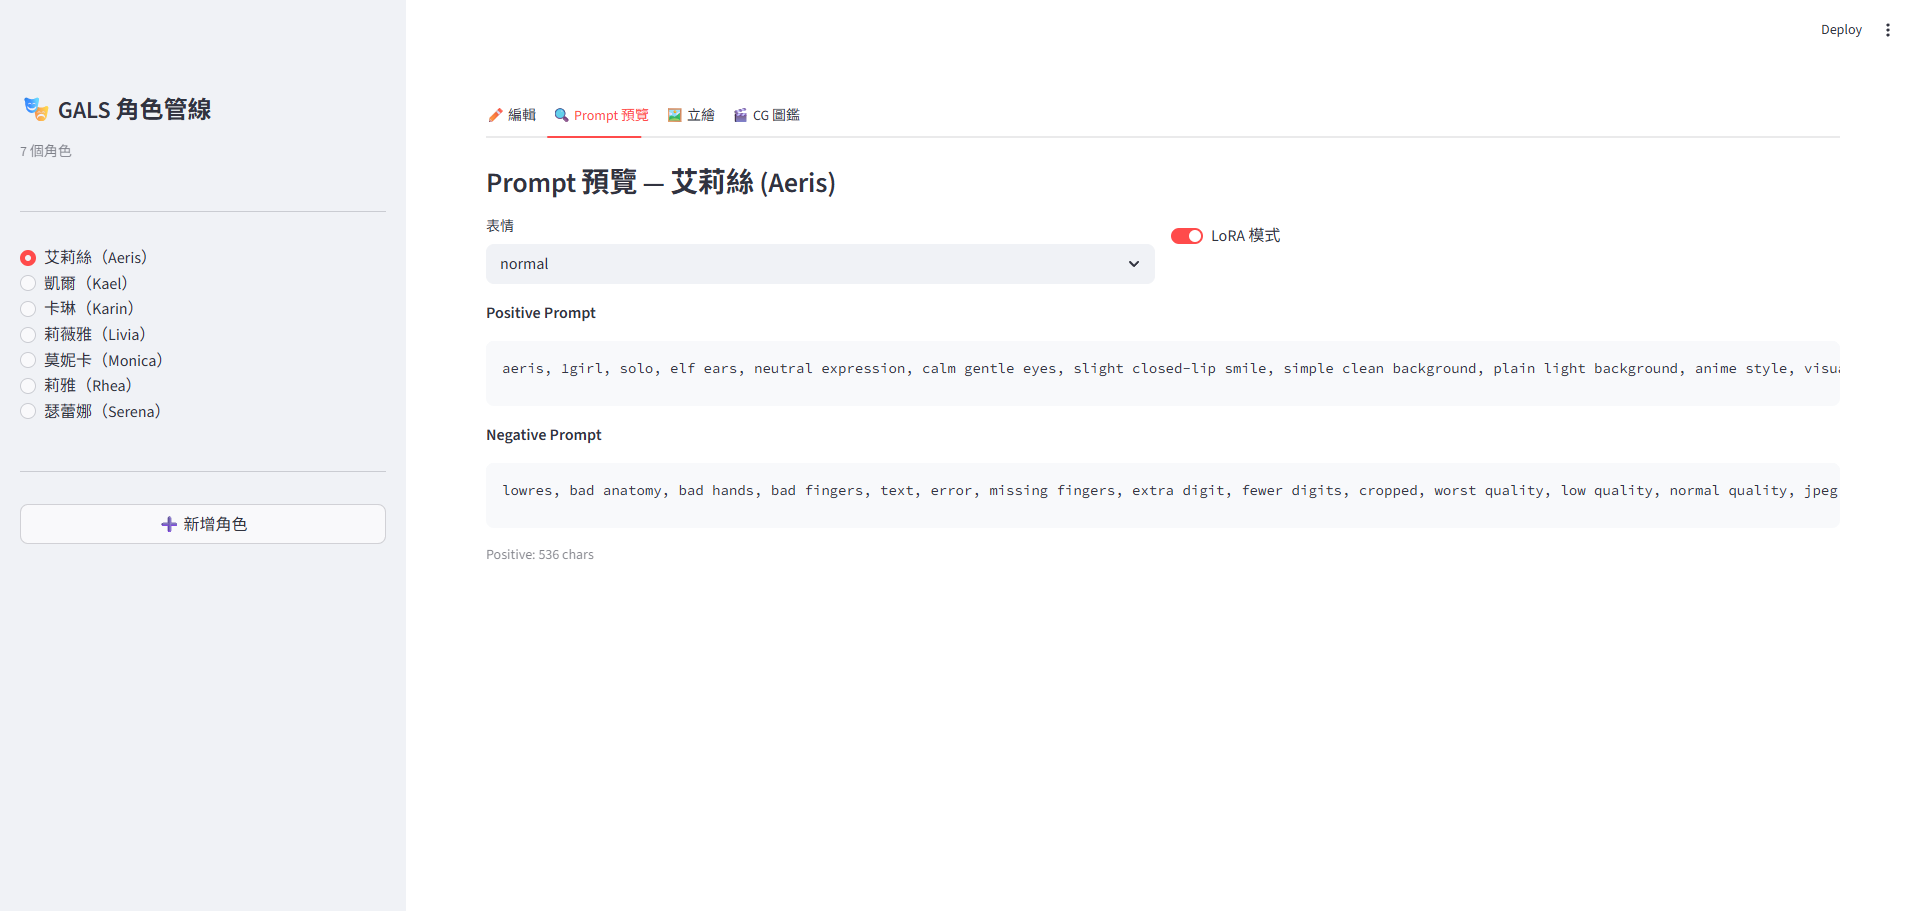
positive: aeris, 1girl, solo, elf ears, full body, standing gracefully in forest clearing, ..._shared.yaml 集中所有共用片段:6 種表情模板、style suffix、negative prompt。Loader 拼裝時:
- 無 LoRA 模式:appearance + outfit + expression + style_suffix
- LoRA 模式:char_id + 1girl + tags + expression + lora_style_suffix(appearance/outfit 被 LoRA
吃進去了,不需要重複寫進 prompt)
這個切換在 web GUI 一個 toggle 完成。
三條流水線
流水線 A — LoRA 訓練(一個角色 ≈ 15 分鐘)
  generate_lora_pic.py --make-base --char aeris        # ① 5 個姿勢的乾淨白底 base
  generate_lora_pic.py --char aeris                    # ② img2img 跑 20 張變體
  prepare_lora_dataset.py --char aeris                 # ③ 轉成 kohya_ss 目錄 + 自動 caption
  kohya_ss GUI → Start Training                        # ④ 訓練 6~8 epoch
關鍵技巧:
- 5 個姿勢 base(front_upper / three_quarter / full_body / side_profile / face_portrait)避免構圖過擬合。每個 base
分攤 4 張變體。- 氛圍詞剝離(ATMOSPHERIC_STRIP_PATTERNS):用 regex 把 appearance 裡的 "holy aura", "glow around her", "sparks around
fingers" 砍掉,避免特效汙染白底。 - Caption 工程:caption 故意只放 char_id, 1girl, solo, view, pose, expression, framing, lighting, background,刻意不寫
appearance/outfit — 讓「每張都有但 caption 沒提」的特徵綁進觸發詞。
- 氛圍詞剝離(ATMOSPHERIC_STRIP_PATTERNS):用 regex 把 appearance 裡的 "holy aura", "glow around her", "sparks around
流水線 B — 出圖(A+B+F Production Workflow)
三個方案的意義:
- A(FaceDetailer + CLIPSeg):解決 SD 在小臉部位畫崩;自動定位 → 裁出 384px → 重繪 denoise=0.4 → 貼回。
- B(Hi-Res Fix 1.5x):先低解析度確認構圖、再 latent 放大重採,比直接 1024 出圖更穩。
- F(Enhanced Negative):強化解剖學黑名單(multiple fingers / disconnected body parts / halo / chroma
key…),整條流程通用。
Python 端把 prompt / seed / lora_name / filename 灌進 JSON 對應節點 ID,透過 comfyui_client.queue_prompt()
送出、poll_status() 輪詢、download_image() 取回 bytes — 用 urllib,沒裝任何重依賴。
流水線 C — Streamlit 角色管線(截圖那支)
streamlit run app.py 4 個分頁,效果如下:
streamlit pipeline 算是最終的集大成,但 text-to-image、image-to-image目前看來技術迭代速度太快,做這個的意義已經不大,項目素材已經一段時間沒有進展,後續可能會朝向整套游戲的框架 pipeline 去設計,大概内容要素如下
- 故事大綱
- 世界觀
- 人物設計
- 基礎設計稿出圖
- 支持多 AI agent 出圖